Change the tracking code
It is possible to change the content of the tracking code once issued.We will show you where the display is different from when you newly registered.
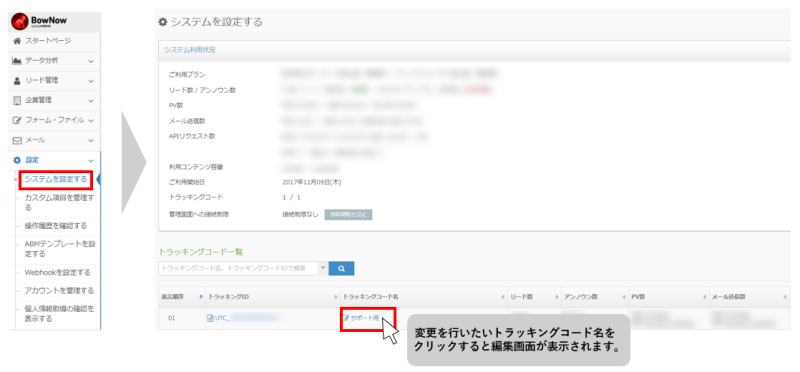
For the transition method to the edit screen, click System Settings> Tracking Code Name you want to change.
Please check the following page for how to change.
* Only the license account can set the site and modify or set the measurement exclusion IP address.
* Modifications and settings other than site settings can be made depending on the range of available functions of the account.
* The number of tracking codes varies depending on the plan you use.
* From ver4.0.0, the name has been changed from the mail delivery group to the old mail delivery group.
*BowNow licenses issued after ver6.4.2 are not limited to free and paid plans.Sample tags, sample email distribution listis automatically generated, and the sample tag "For test distribution list" will be displayed in the tag setting field.
Basic Information
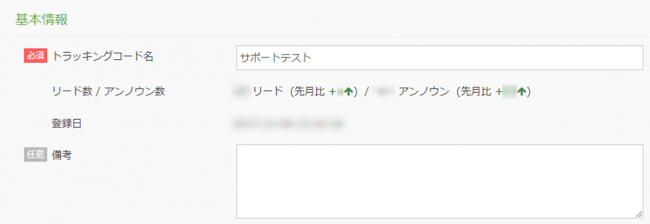
| [Required]Tracking code name | Set the tracking code name to be created. |
|---|---|
| Number of leads / number of unknowns | The number of leads and the number of unknowns registered on the management screen are displayed. The green part shows the number increased in the current month. |
| Date of Registration | The date the tracking code was first registered is displayed. |
Site settings
| [Required]Site settings | Please set the URL of the website where you will install the BowNow tracking code. It can be set only with the license account. |
|---|
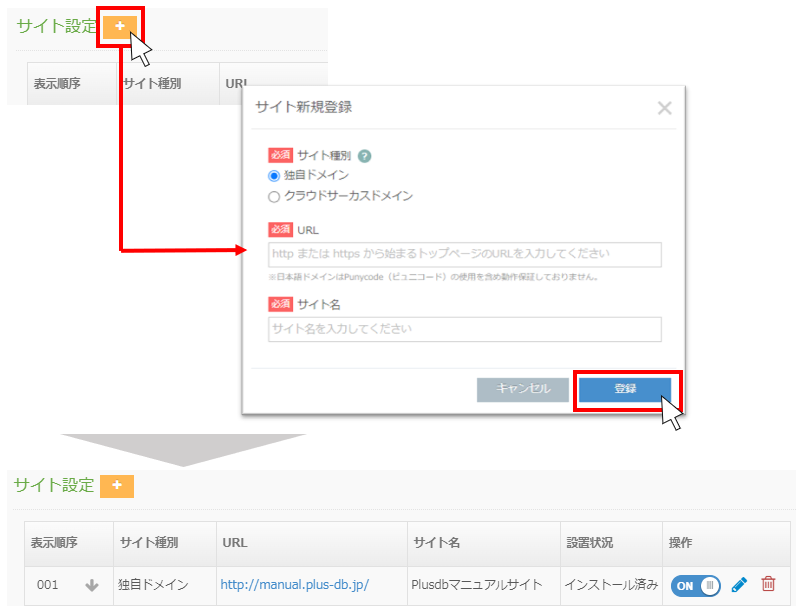
To add, click the "+" button on the right side of the site settings. A pop-up called "New site registration" will appear. Select the site type, enter the URL and site name where you want to install the tracking code, and click the register button. please give me.
Click the register button to move to the "Register tracking code" screen and the information will be displayed in the site settings.
Own domain
You can register the URL of the original site for your own domain.
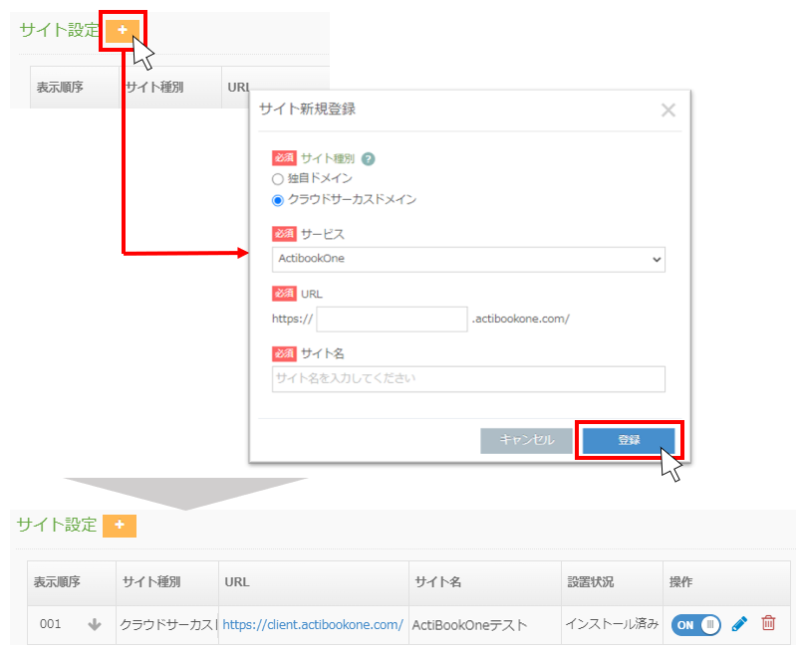
cloud circus domain
Cloud Circus domain can register the site URL of the service provided by Cloud Circus.
The installation status will be changed to "Installed" when the tracking code is installed on the website and tracking starts.
In the operation, there are ON and OFF buttons, but these can be changed after the installation is completed.
You can change the created URL and site name by clicking the pencil button, and delete it by clicking the trash can mark.
Code information
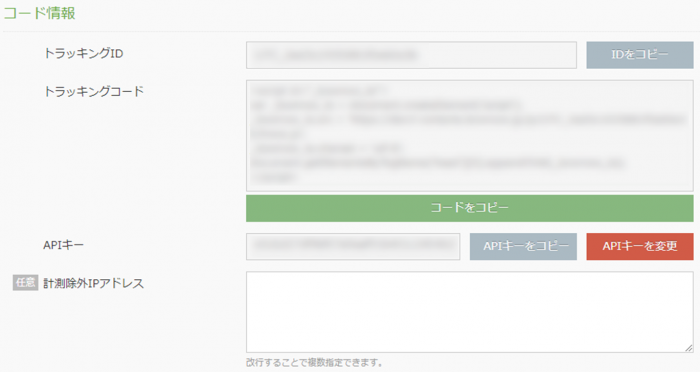
| Tracking ID | Display the created tracking ID. |
|---|---|
| Tracking code | Displays the site reflection code when installing on the website. * Please note that if there is an excess or deficiency in the copied content when setting up the website, it will not be tracked normally. |
| API key | It is used when linking with tools such as CMS Blue Monkey and Plusdb provided by us. |
| Measurement exclusion IP address | If you have an IP address that you would like to exclude, such as excluding the access status of your company's website, please enter it here and register. |
Old mail delivery group settings
From ver4.0.0, the name of the mail delivery group has been changed to the old mail delivery group.
| Old mail delivery group settings | "Existing" and "New prospect" are set by default. You can create and delete the old mail delivery group used on the management screen.The maximum number of creations is 250. Please note that if you delete the old mail delivery group in the system settings, the old mail delivery group set as the lead will also be deleted. |
|---|
Status settings
| Status settings | By default, "latent", "revealed", "appointment prospect", "appointment", "visited", "project", "order received", "under support", and "not applicable" are set. You can create and delete the status used on the management screen. The maximum number of statuses that can be created is 100. Up to 7 can be displayed on the "Dashboard" and "Search for leads screen". Please note that deleting the status in the system settings also deletes the status set for the lead. You can change the status automatically by using the form or downloading the file in the form and file settings. Current stay at the time of automatic change |
|---|
How to add status
To add it, click the "+" button on the right side of the status setting, and a pop-up saying "New status registration" will be displayed.Describe the status name you want to set and the conditions for this status in the description, and click the register button.
Click the register button to move to the "Register tracking code" screen and the information will be displayed in the status settings.

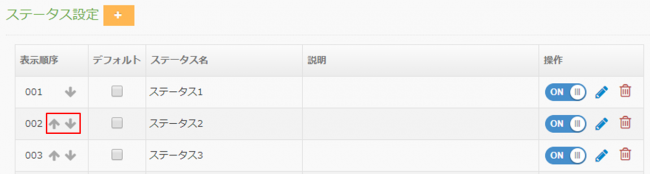
The display order can be changed with the up and down arrows.
If you check the default, when you "register a lead",
Initial value of status The one with the default checked is displayed.
* The default is only one setting for each setting.
Method of operation
| ON, OFF | The status that was turned off at the time of lead registration (individual registration, batch registration) will not be displayed, and registration will not be possible. |
|---|---|
| Pencil mark | It becomes a button to change the status information. |
| Trash can mark | Please use it to delete the status information. |
Status priority
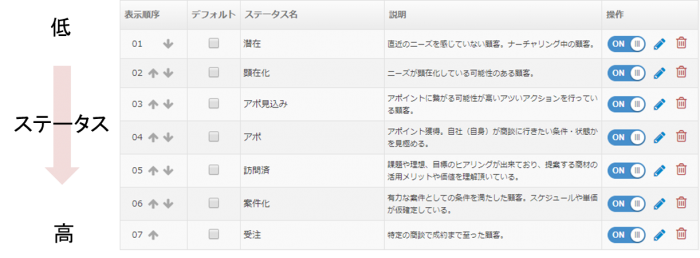
The status currently in use is displayed in a list in the status setting field of the system settings.The order of priority changes depending on the order of status, so please check if the display order is correct when using.
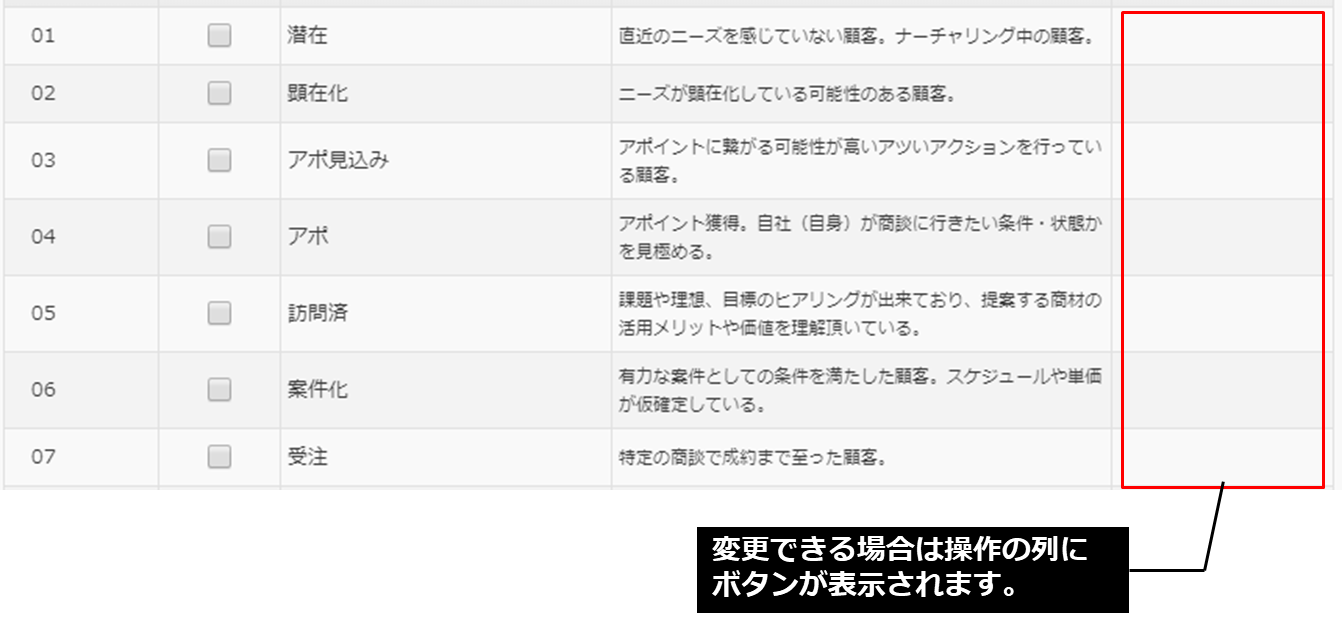
one point
If you are using the ABM template, you cannot change the status information of "latent", "revealed", "appointment prospect", "appointment", "visited", "project", and "order received".
You can change the status of "Supported" and "Not applicable".
Group settings
| Group settings | "New", "Existing", "Agency", "Competition", and "Cancellation" are set by default. You can create and delete groups to be used on the management screen. The maximum number of groups that can be created is 100. Please note that if you delete a group in the system settings, the group set as a lead will also be deleted. |
|---|
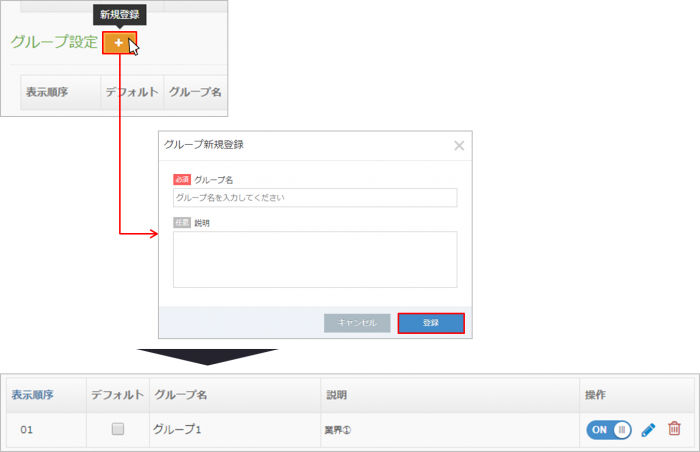
How to add
If you click the "+" button on the right side of the group setting, a pop-up saying "New group registration" will be displayed.
Describe the group name you want to set and the conditions for this group in the description, and click the register button.
Click the register button to move to the "Register tracking code" screen and the information will be displayed in the group settings.
The display order can be changed with the up and down arrows.
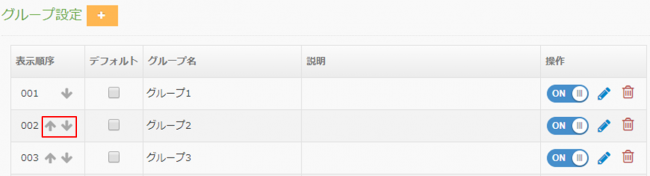
If you check the default, when you "register a lead", the default value of the group that is checked will be displayed.
* The default is only one setting for each setting.
About the operation frame
ON, OFF: Groups that were turned off during lead registration (individual registration, batch registration) will not be displayed, and registration will not be possible.Pencil mark: It becomes a button to change the information of the group.
Trash can mark: Please use when deleting group information.
Tag setting
| Tag setting | The default settings are "Inquiry", "Exhibition", "Seminar", "Document DL", "Visited", "Existing", "Quotation Submission", "Open", "URL Click", "Email Check NG", "Unchecked Email", and "Reactive". It has been. You can create and delete tags used on the management screen. The maximum number of tags that can be created is 605. Please note that if you delete the tag in the system settings, the tag set for the lead will also be deleted. *For BowNow licenses issued after ver6.4.2, in the tag setting field after creating the tracking codeSample tag "For test mailing list" Is displayed. The sample tag is automatically reflected in the "management information" of the lead details of the sample lead. *From ver6.18.0, the tags "Email Check NG", "Unchecked Email" and "Reactive" issued by the BowNow system cannot be deleted at will. |
|---|
Lead acquisition source setting
| Lead acquisition source setting | By default, "Search engine", "Web advertisement", "Exhibition", "Tele appointment", "Introduction", and "Other" are set. You can create and delete lead acquisition sources to be used on the management screen. The maximum number of lead acquisition sources that can be created is 250. Please note that if you delete the lead acquisition source in the system settings, the lead acquisition source set for the lead will also be deleted. |
|---|