Manage custom fields
On the custom item management screen, you can customize and add any items for leads.
* Custom functions are not available for "Company".
Created custom items can be used in mail distribution lists, saved search conditions, and forms.
It can also be inserted as a mail merge code into the email body (including automated form emails).
About the creation procedure
You can create a new item by clicking the "Add Custom Item" button on the Settings > Manage Custom Items screen.
On this screen, change the custom item toRegistration/Change/DeleteOperation is possible.
*Custom items areUp to 50Registration is possible.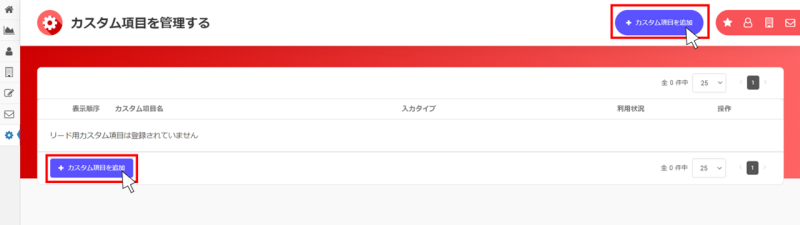
custom field name
Enter a custom field name.
[Example] Nickname, etc.
input type
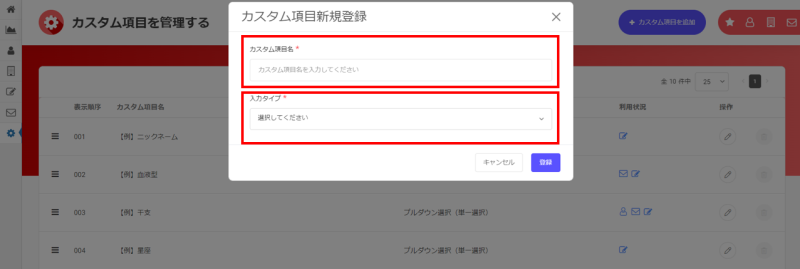
You can select from the following.
- Text input (single line)
- Text input (multiple lines)
- URL
- Radio button selection (single selection)
- Pull-down selection (single selection)
- Check box selection (multiple selection)
- List selection (multiple selection)
list contents
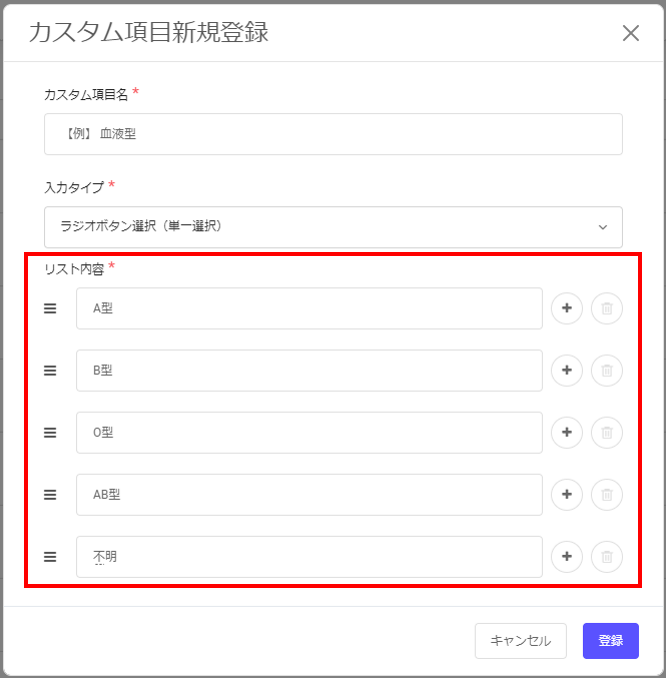
For input type "Radio button selection (single selection)", "Check box selection (multiple selection)", "List selection (single selection)",
Enter the contents of the list.
* List contentsUp to 30Registration is possible.
You can increase the contents of the list with the "plus button (+ icon)" on the right.
You can delete the contents of the list with the "Delete button (trash can icon)" on the right.
You can change the order of the contents of the list with the "≡ button" on the left.
Show unselected
In the case of input type "Pull-down selection (single selection)", set "Unselected display" (ON / OFF, input of display content).ON: You can set the default display of the pull-down when the list contents are not selected to "Please select."
OFF: The default display of the pull-down when the list contents are not selected is the top of the list contents
About operation
After creation, you can edit/delete from "Operation" on the screen for managing custom items.
Edit: Click the edit button (pencil icon) > "Edit custom item"
Delete: Delete button (trash can icon) > Click "Delete custom item" > ☑ to confirm modal and "Delete"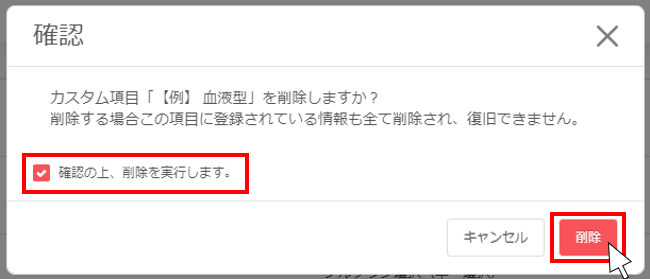
Click here for notes on editing/deleting and custom items that cannot be deleted.
Usage status
You can check which "lead saved search criteria", "email distribution list", and "form" the custom item is used.*If the icon is not displayed, it is not in use.

You can check the "name", "updated by" and "updated date" by clicking each usage icon.
For forms only, the form name is a link and you can open the details screen of the form in use in a separate tab.
[Example] Saved search conditions for leads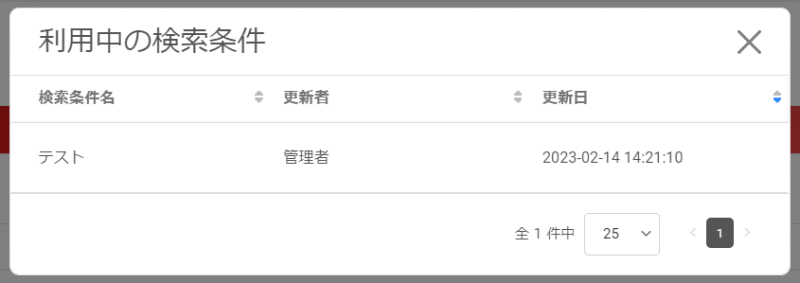
The mechanism for reflecting the usage status is as follows.
| Find Leads > Include Custom Fields in Search > Search → Save the search conditions as they are * Even if you add a tag and save the tag as a condition, it will not be reflected. |
|
| Find Leads > Include Custom Fields in Search > Search →Create an email distribution list * Even if you add a tag and create a distribution list with that tag as a condition, it will not be reflected. |
|
| Item Settings > Add New Item > Add Custom Item → Register (change if editing a created form) * Form usage status ON/OFF, inquiry page public/private, form CV → It has nothing to do with the reflection of the usage status. |
Click here for details about usage status of custom items not being reflected
Operation method
The created custom items can be used in lead saved search conditions, email distribution lists, and forms.When used as saved search conditions for leads
Search Leads > Custom Items to select and search conditions and save the search conditions directly without adding tags.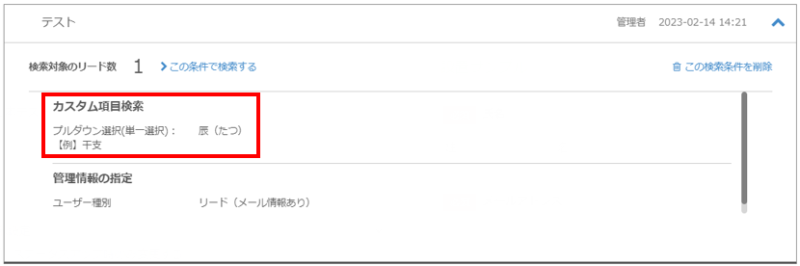
Click here for how to save search conditions
When using as an email distribution list
You can create an email distribution list directly without adding tags by selecting and searching conditions with Find Leads > Custom Items.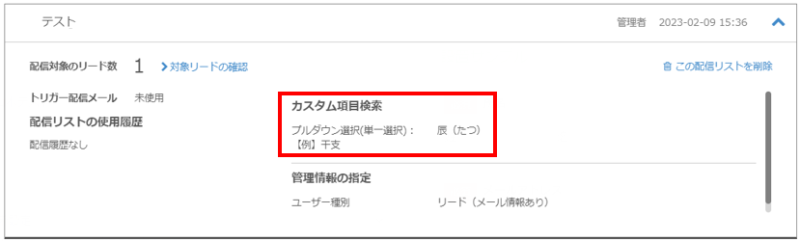
Click here for information on saving as an email distribution list
Click here for how to use it as an email mailing code
When using in form
Manage form > Item settings > Add new item > Add custom item linkage item.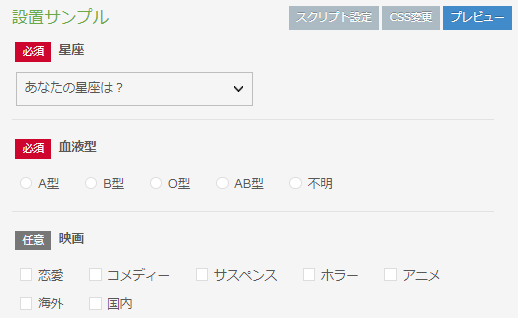
Click here for registration form
Frequently Asked Questions
Click here for custom item creation and operation examples
After setting custom items, CSV import is not possible/error occurs
I want to edit/delete custom items.Can't delete custom fields
I want to change the order of custom items.Where is the change reflected?
Is it possible to report custom items?
Can you tell what the custom field is from the mail merge code?